🧮 Inventory Management
Overview
The Inventory Management module is the central hub for tracking and managing all your stock items in LogisticsLink. This comprehensive guide details the features available in the inventory screen, explains the differences between available, reserved, and ordered amounts, and walks you through the functions in the manage tab, such as adding items and exporting to PDF/Excel.
Accessing the Inventory Page
To navigate to the Inventory Page:
- Click on "Inventory" from the drop-down menu on the right side of the screen
- Select "Inventory list" from the submenu
- You will be taken to the main inventory dashboard
Understanding Inventory Quantities
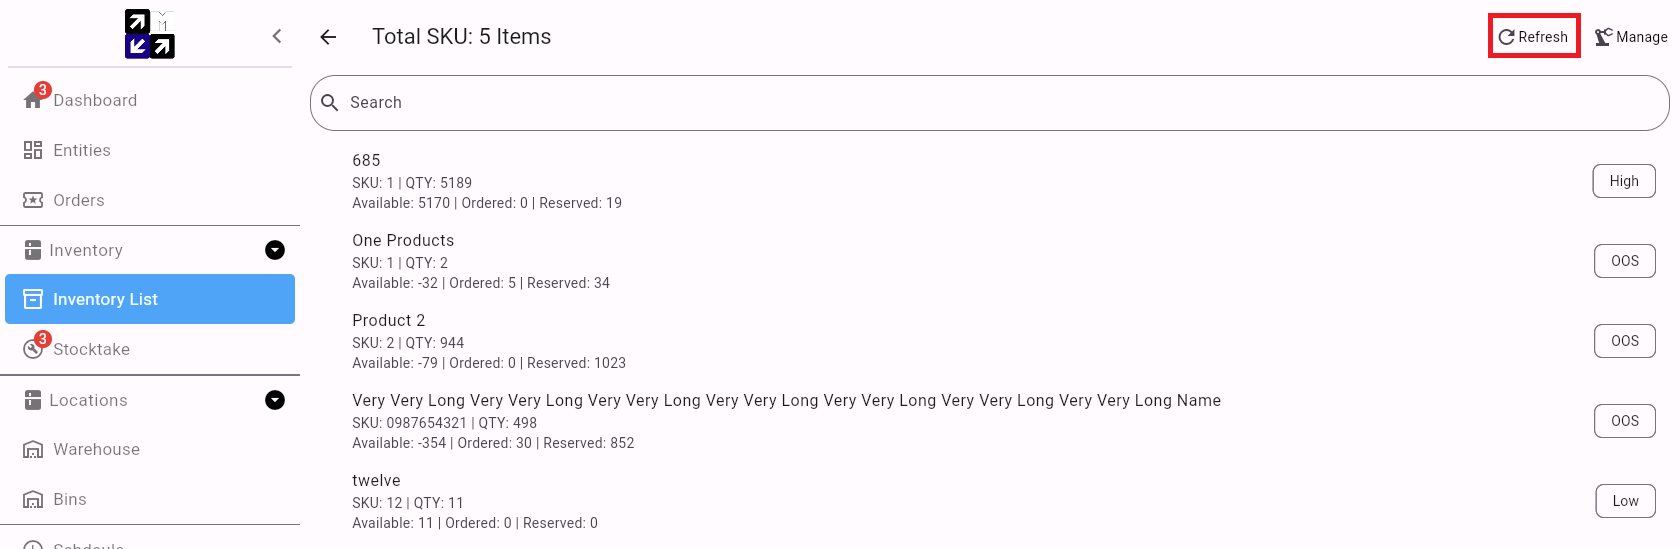
The inventory screen displays all items in your inventory along with their corresponding quantities. These quantities are categorized into three main types:
Available Amount
- Definition: The quantity of items currently available for use or sale
- Calculation: Total stock quantity minus the reserved amount
- Usage: This is the amount you can allocate to new orders
- Importance: The key metric for determining if you have sufficient stock to fulfill customer orders
Reserved Amount
- Definition: The total quantity currently reserved by all send orders
- Calculation: Sum of all quantities allocated to pending outbound orders
- Usage: These items are allocated to specific orders but have not yet been physically removed
- Importance: Helps prevent over-allocation of inventory and ensures order fulfillment capacity
Ordered Amount
- Definition: The total quantity that has been ordered but not yet received
- Calculation: Sum of all quantities in pending inbound orders
- Usage: Tracks expected incoming inventory
- Importance: Helps forecast future inventory levels and plan for upcoming stock arrivals
Understanding these quantities is essential for effective inventory management, as it helps you:
- Ensure the right amount of stock is available to fulfill orders
- Prevent stockouts by monitoring available quantities
- Avoid overstock situations by tracking incoming orders
- Make informed purchasing decisions based on current and projected inventory levels
Refreshing the Inventory
Refreshing the inventory is a vital step in managing items, as it ensures that changes made from committing orders are reflected on the index correctly.
Why Refresh is Important
- Until the inventory is refreshed, any updates (such as stock additions/removals or new items) will not be visible on the main inventory page
- This step helps maintain the accuracy of inventory records
- Ensures that inventory levels are up to date
- Enables smooth order processing
- Minimizes errors in inventory management
How to Refresh
- Locate the refresh button in the top right corner of the inventory screen
- Click the refresh button to update the inventory display
- The system will rebuild the index with the latest data
If the Inventory on hand figure looks inaccurate, the refresh button will rebuild the index. Selecting an item, however, will take you to the inventory item record, which is accurate in real-time. LogisticsLink maintains Inventory and Stock on hand in real-time; however, the inventory page may show outdated figures if changes are made while the page is open.
Manage Tab Functions
The Manage tab contains useful functions for inventory management, such as adding items or exporting to PDF/Excel.
Accessing Manage Options
- Click the Manage icon in the top right corner of the inventory screen
- A dropdown menu will appear with various options
- Select the desired function from the menu

Adding New Items
Adding items to the inventory is straightforward:
- Click "Add Item" from the Manage dropdown
- Enter the Product Name (detailed description)
- Enter the SKU (Stock Keeping Unit)
- The SKU is a unique identification code for each item
- Ensures accurate tracking and management within the system
- Click "Add Item" to save the new product
The product name can include a detailed description, which provides more context and information about the item. This description also allows the item to be searched using additional keywords, making it easier to find specific products.

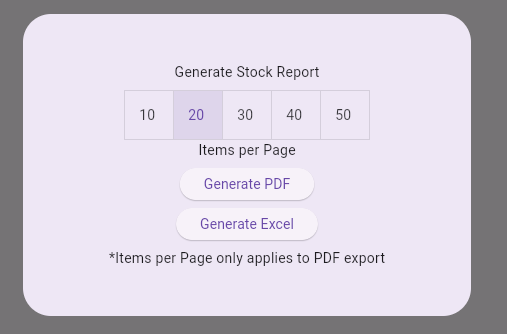
Exporting Inventory Data
Exporting inventory data provides options for data analysis and reporting:
- Click "Export" from the Manage dropdown
- Choose your preferred format (Excel or PDF)
- Specify how many items per page should be displayed
- Click "Export" to generate the file
This function facilitates comprehensive data analysis and reporting, allowing you to:
- Create custom reports for stakeholders
- Perform detailed inventory analysis
- Maintain records outside the system
- Share inventory data with other departments
Individual Item Management
Clicking on an individual item opens a detailed page containing comprehensive information, history, and configuration options for that specific item.
Details Tab
The Details tab displays all available information for the selected item:
- Item Image: Visual representation of the product
- SKU: Unique identification code
- Status: Current state of the item
- Last Updated: Date of the most recent change
- Reserved Quantity: Amount allocated to pending orders
- Ordered Quantity: Amount expected from incoming orders
- Available Quantity: Amount ready for allocation
- Total Quantity: Sum of all stock for this item
- Product Name: Full description of the item
- Stock Warning Levels: Thresholds for inventory alerts
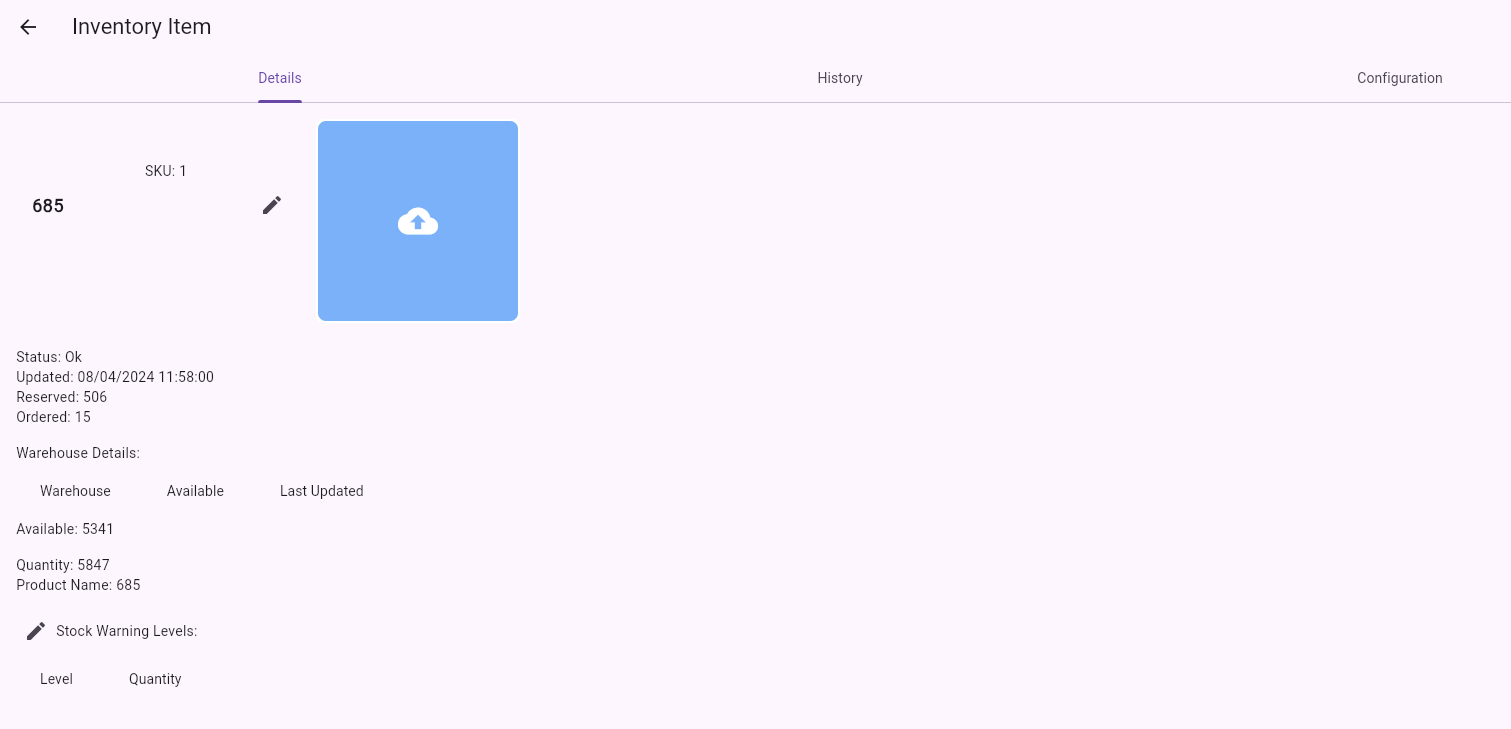
Stock Warning System
The stock warning system provides visual indicators of inventory levels:
- Purpose: Proactively manage inventory with visual cues
- Configuration: Set high, medium, and low stock thresholds
- Functionality: Warning level updates automatically when stock falls below thresholds
- Benefits:
- Ensures timely reordering
- Prevents stockouts
- Avoids overstock situations
- Maintains optimal inventory levels
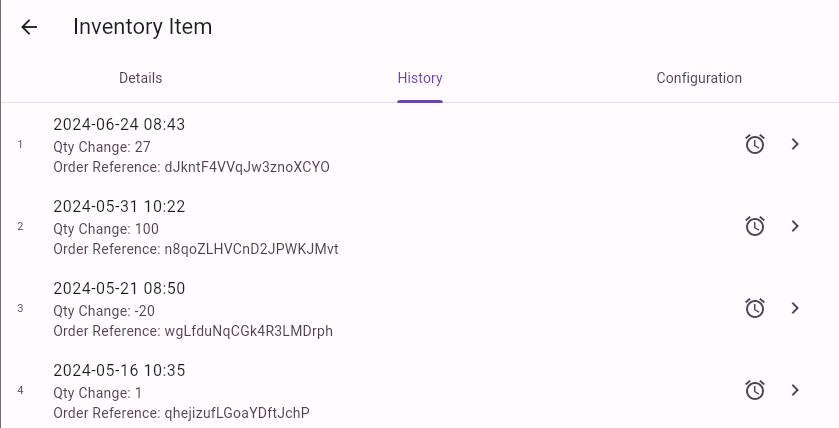
History Tab
The History tab provides a comprehensive record of all inventory changes:
- Content: Every order that changed this item
- Information Displayed:
- Date of change
- Quantity changed
- Order reference number
- Functionality: Button to open the order responsible for each change
- Usage: Track inventory movements and audit changes
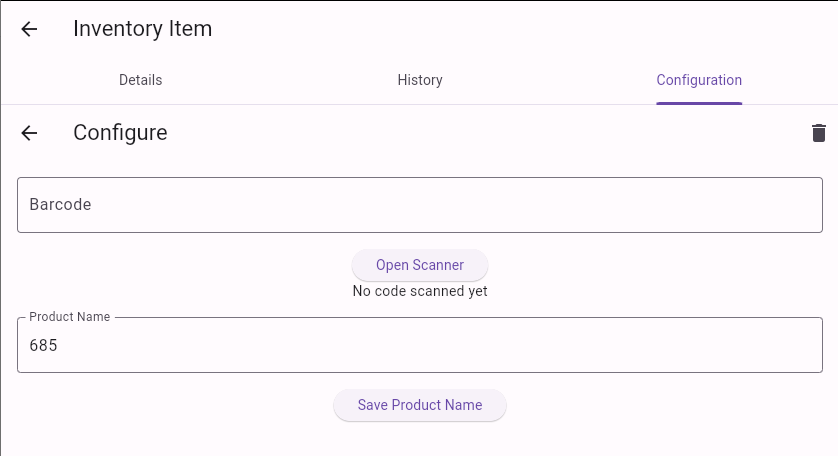
Configuration Tab
The Configuration tab allows for item customization and management:
- Editable Fields:
- Barcode number
- Product name
- Actions:
- Copy item details
- Edit item information
- Delete item from inventory
- Usage: Maintain accurate item data and remove obsolete items
Best Practices for Inventory Management
To maximize the effectiveness of the Inventory Management module:
- Regular Refreshing: Refresh the inventory page frequently to ensure you're working with current data
- Accurate Item Setup: Provide detailed product information when adding new items
- Monitor Warning Levels: Set appropriate stock warning thresholds and respond to alerts promptly
- Review History: Regularly check the history tab to track inventory movements and identify patterns
- Export Data: Periodically export inventory data for backup and analysis purposes
- Maintain Clean Data: Update or remove obsolete items to keep your inventory list current and accurate