📄 Creating a consignment
To create an consignments navigate to the top selection bar and hover over "Create/Manage" and select "Unmanifested Consignments".
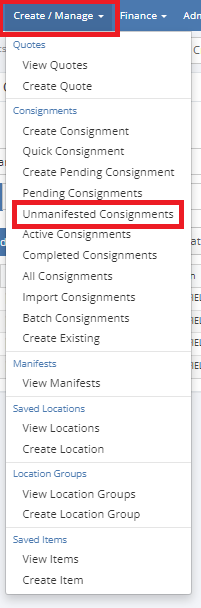
This will open the main page where consignments will be created and managed.

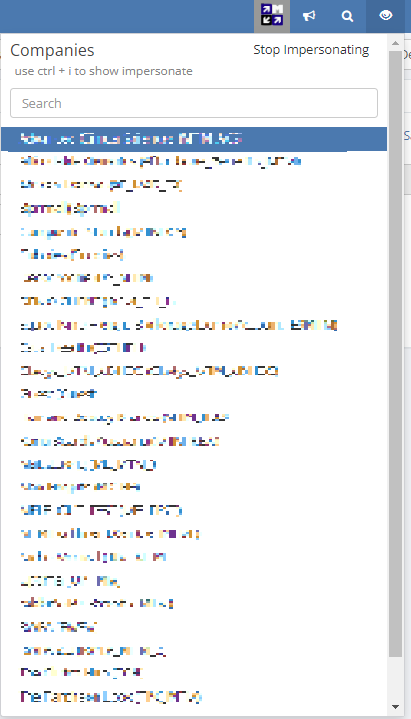
Consignments can be made for specific companies. To select which company your order will be charged to, click on the eye icon in the top right corner to open the dropdown menu of companies and select the appropriate one. Once selected, the eye icon will turn yellow, and a popup in the bottom left corner will appear, stating "You are currently impersonating Company Name," indicating that you have selected a company.
Filling out consignment
Once a company is selected, press the "Create" button to open the new "Create Consignment" window for making an consignment. This page has three main sections. The top half is for entering the pickup and delivery location addresses. The middle section is for entering package dimensions and selecting delivery requirements. The bottom of the page is for selecting the appropriate courier to take the package.
The pickup location is usually already filled in and only the delivery address needs to be added though this should be double check.
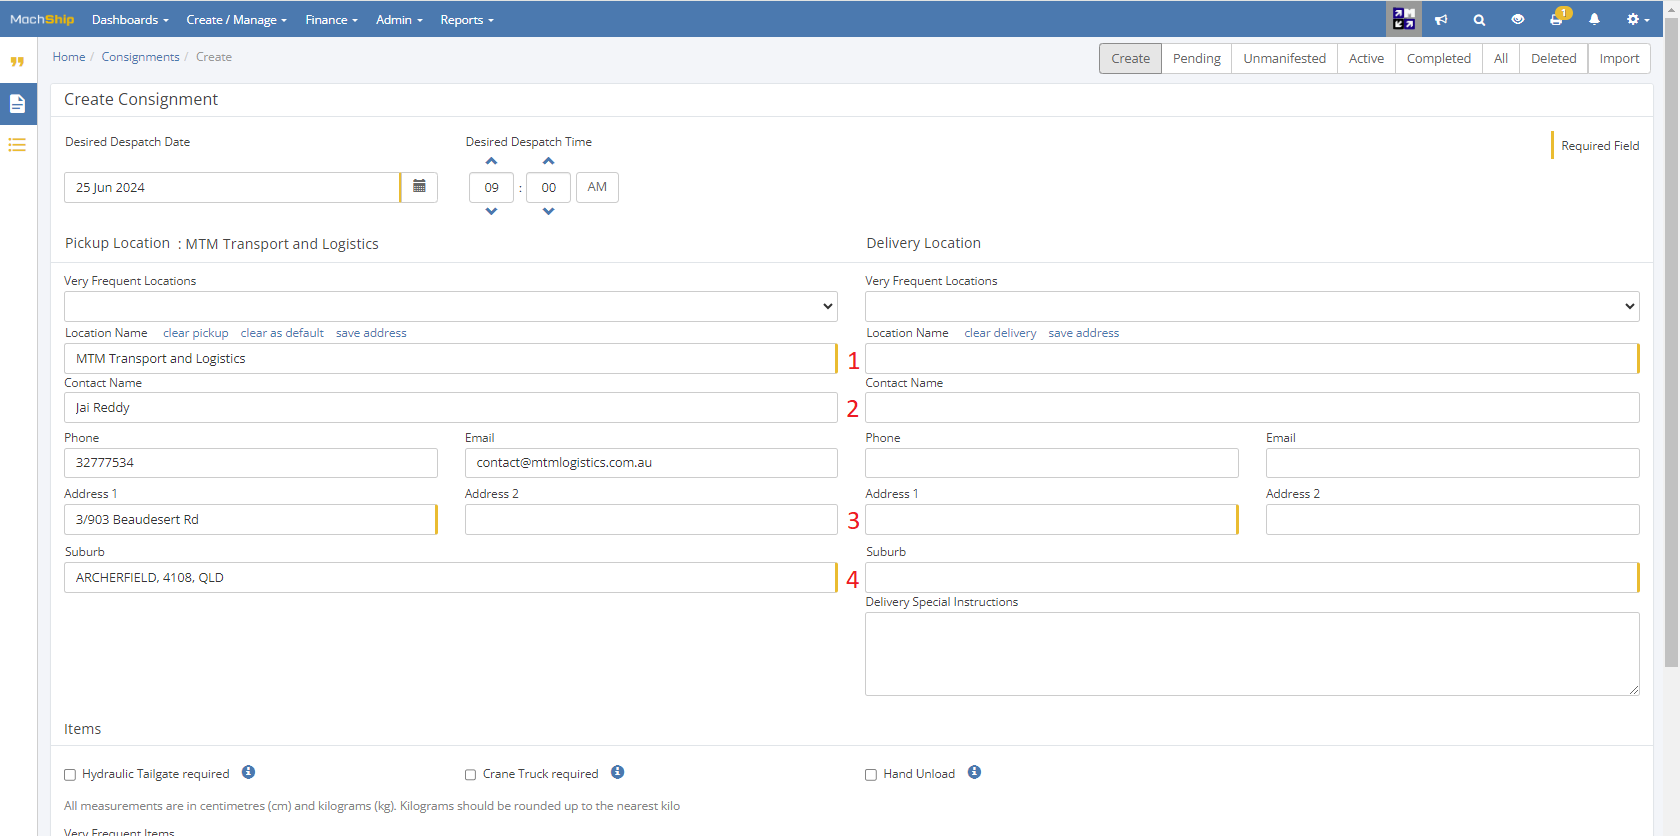
In Section 1, the location name is required. This can be either the business name or the name of the client. When a name is entered, the system will search for it and provide a list of autofill options that match the name. These options can be used, but should always be double-checked, as places may have alternate address locations.
Autofilled addresses must be double checked.
Section 2 is optional but recommended for residential deliveries when creating an order.
Sections 3 and 4 are mandatory; these sections include the address and suburb for the delivery. If the address contains a unit number, PO box number, or other secondary location information, enter the primary building address in spot 1 and the secondary address in address spot 2. In the suburb section, write either the name or postcode, and a list of options will appear. Select the option that matches the order.
Sometimes the name or postcode can differ from the options. It is recommended to Google the location on the order to determine the most appropriate option.
Package dimensions
In the middle of the page is where the package details are entered.
The "Very Frequent Items" dropdown menu offers premade item dimensions for common package types, such as 3kg satchels or 10kg boxes. However, it is not recommended to use these as they can be very inaccurate.
The "Item Name" field is used when creating items for packages already added to that company's account. This is useful if the company frequently sends out packages with known sizes and weights.
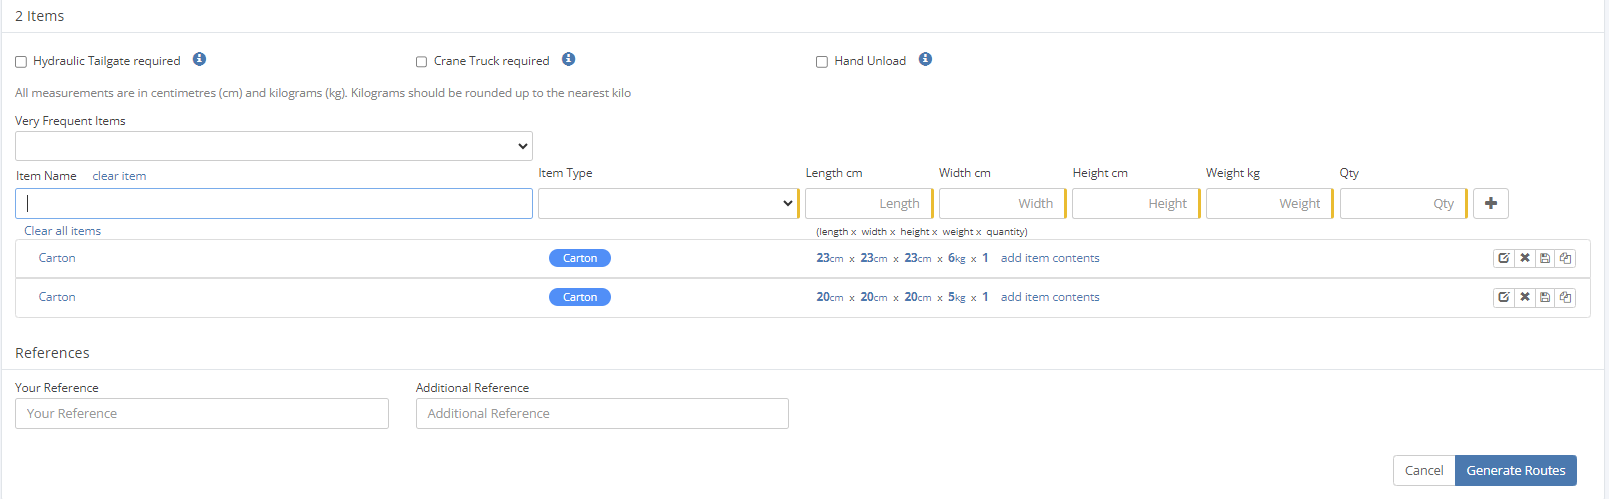
If no premade option is available, fill in the information manually: Item type, Length (cm), Width (cm), Height (cm), Weight (kg), and Quantity. The Item type refers to the type of package being sent, most commonly a carton. All dimensions are in centimeters, weight is in kilograms and Kilograms should be rounded up to the nearest kilo.
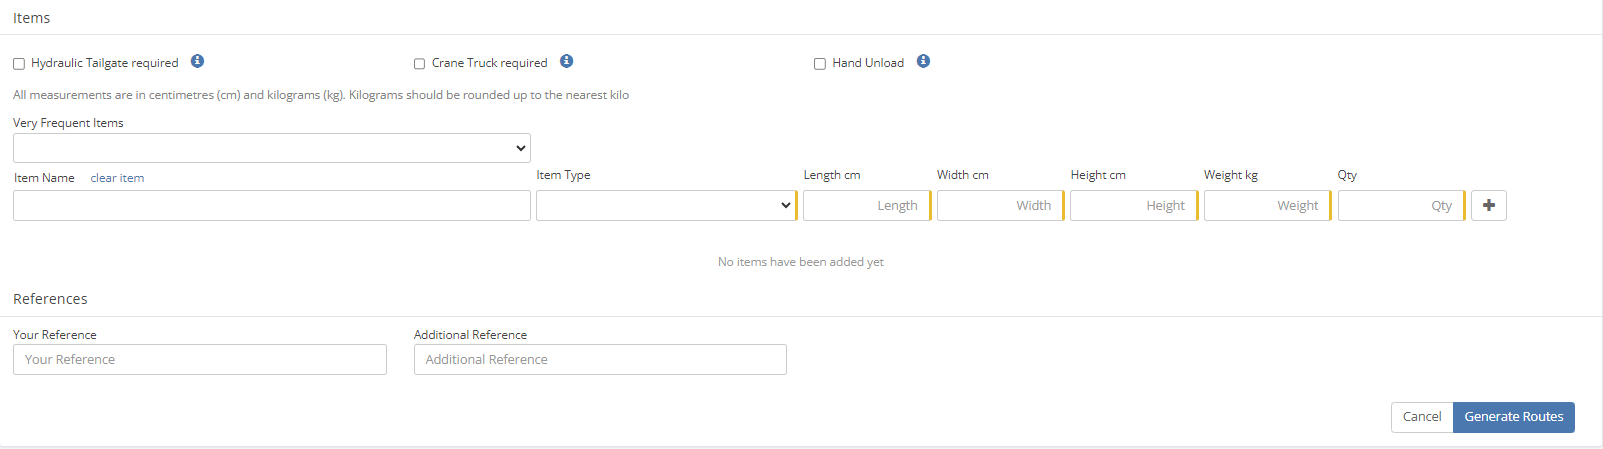
All dimensions are in centimeters, and weight is in kilograms and should be rounded to the nearest kilo. To quickly select a carton as Item type press c and carton will be selected.
Multiple packages can be created using either the "Qty" field if they have the same dimensions and weight, or the plus button if they are different.
Once the item information is entered and the address has been double-checked, press "Generate Route" to see which courier options are available for that order.
Item extras
Above the item dimensions section there is the option to select "Is this a residential delivery?" this must be ticked for residential delivery.
Below the item dimensions section is where the order reference needs to be added, as it is used to ensure the label goes onto the right order. The package reference number's location depends on the company.
Route selection
When "Generate Route" is pressed multiple options will appear bellow it. Which one to select is depended on the Company and their preferences.
A general guide to Couriers is available here: Courier information
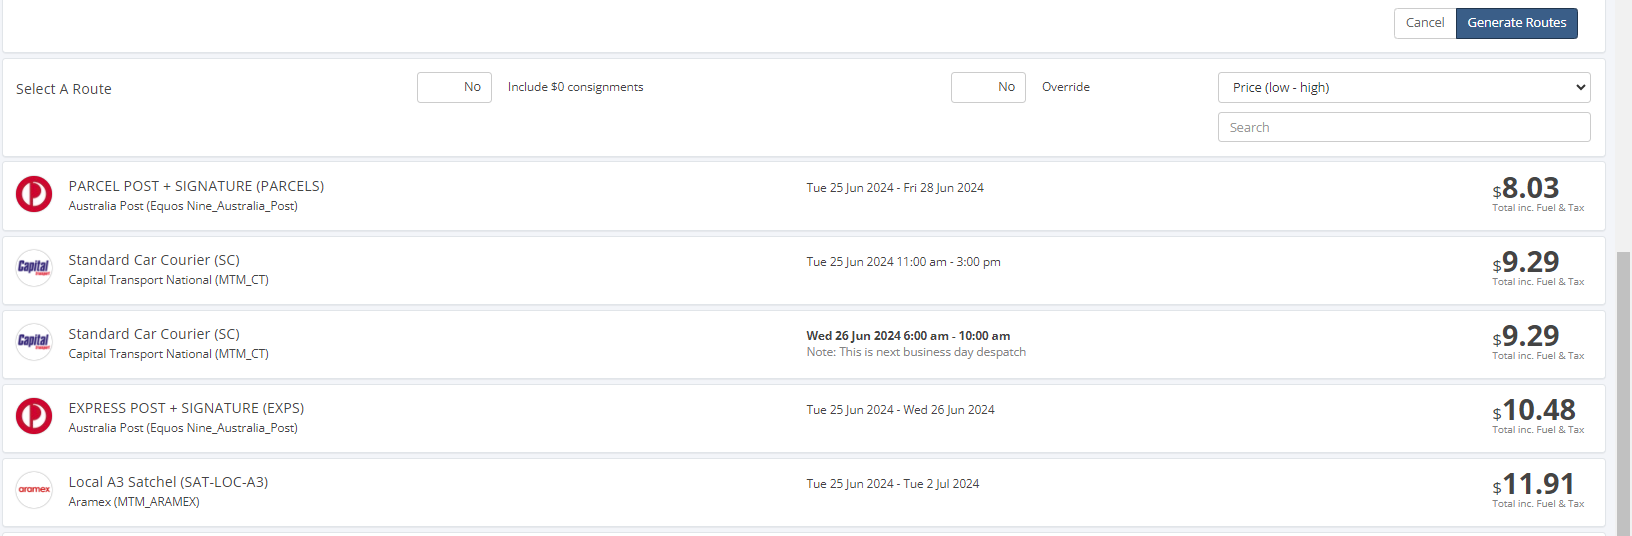
Once selected, an overview of the address location and pricing will be displayed. Once the information has been checked, press "Create Consignment".
This will take you back to the "Unmanifested Consignments" page, and the order will appear there.
Printing label
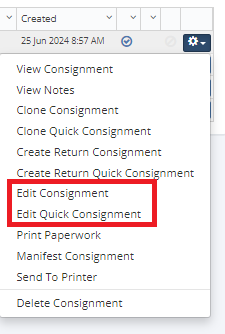
To print a single order, click on the blue cog to the right of the order and select "Send to Printer".
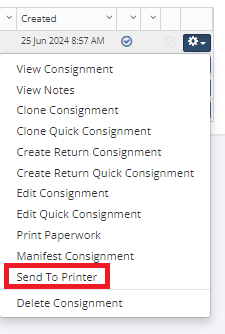
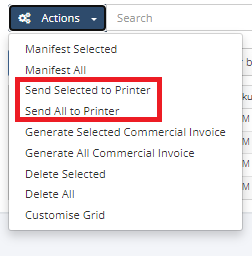
If multiple or all of the orders need to be printed, press the cog above the list called "Actions". This has the options to "Send Selected to Printer " and "Send All to Printer".
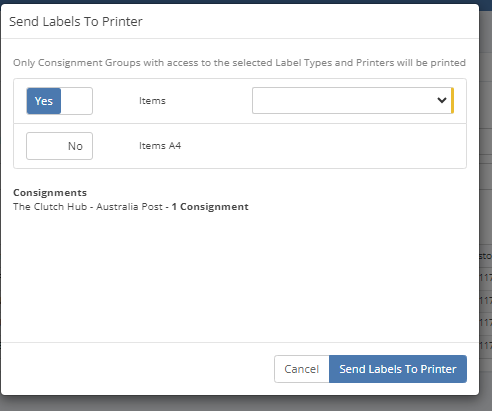
Either option will open the "Send Labels to Printer" option. Here, make sure "Items" are set to "Yes" and that the printer option beside it is selected. The printer option will change based on the company selected.
The Press the blue button in the bottom right "Send Labels To Printer" to print.
Fixing mistakes in the order
If an error is found on the label and the consignment needs to be changed, click on the blue cog next to the order and select "Edit Quick Consignment" or "Edit Consignment" to open the consignment for editing.